
What we will be learning?
- Introduction to Linux and High Performance Computing (HPC)
- Basic navigation in Linux
- Managing files/folders
- File manipulation and editing
- Wildcards and permission
- Filtering and searching
- Piping & Redirection & Process Management
- Submitting task/jobs using SLURM
- Installing software
- Opening a terminal
Windows users – open MobaXterm
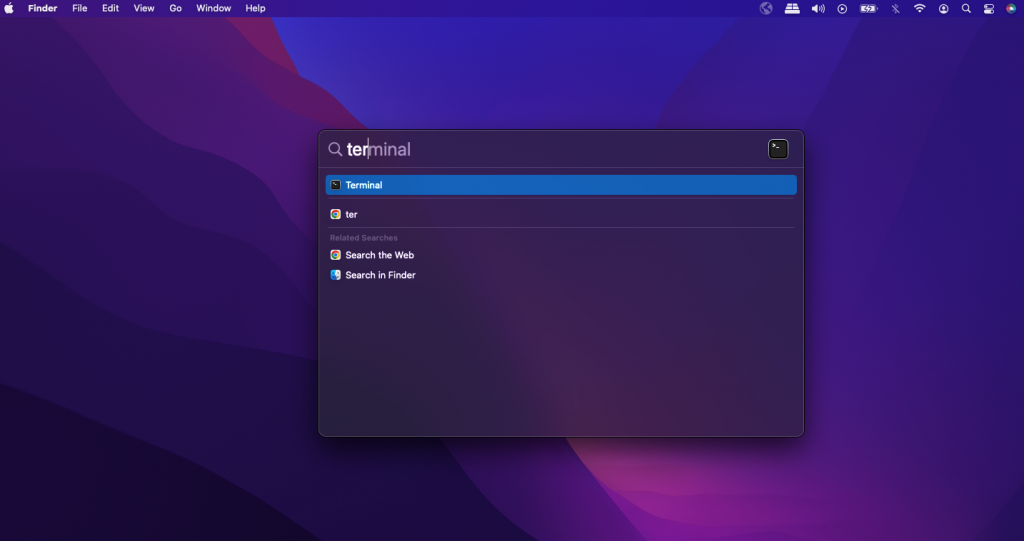
Mac users – go to the search/finder/spotlight and type terminal
2. Connecting to the QU-Azure HPC for the first time
- Important information: hostname/IP address is 172.29.70.11
- Windows users
- Click on the Session icon on the top left corner
- Then click the SSH icon
- in the box showing Remote Host, type 172.29.70.11
- Then, click the checkbox for Specify Username and put in your QU username (not the email address!)
- Then click OK


- If it ask for password, type qu1234
- IMPORTANT: When you type your password, it may seem like nothing is showing up on the screen BUT it is there. This is just a security feature of MobaXterm.
- It will ask you to accept some agreements, just click Accept or OK for all of them.
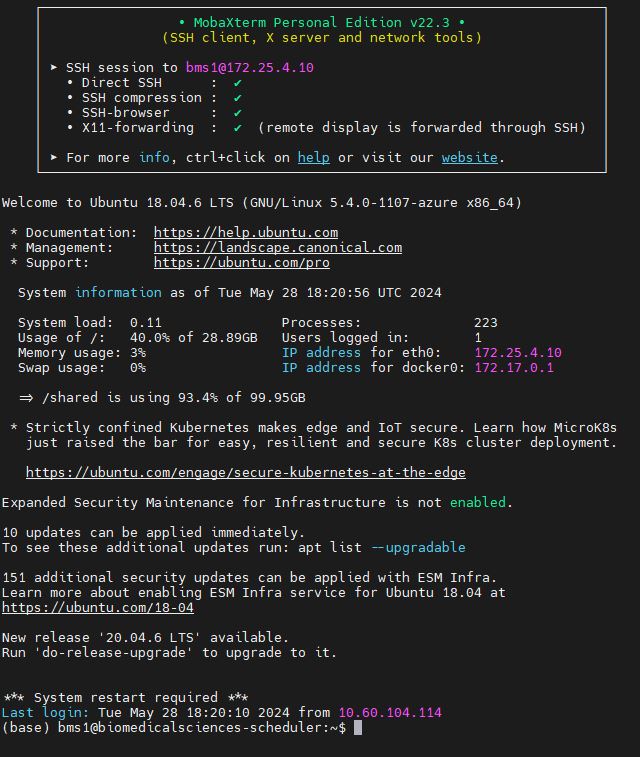
- Finally, you will see an image like below
- Mac users
- open the terminal application
- then type on the terminal: ssh YOUR_USERNAME@172.29.70.11 and press enter
- replace YOUR_USERNAME with your username e.g., an12345
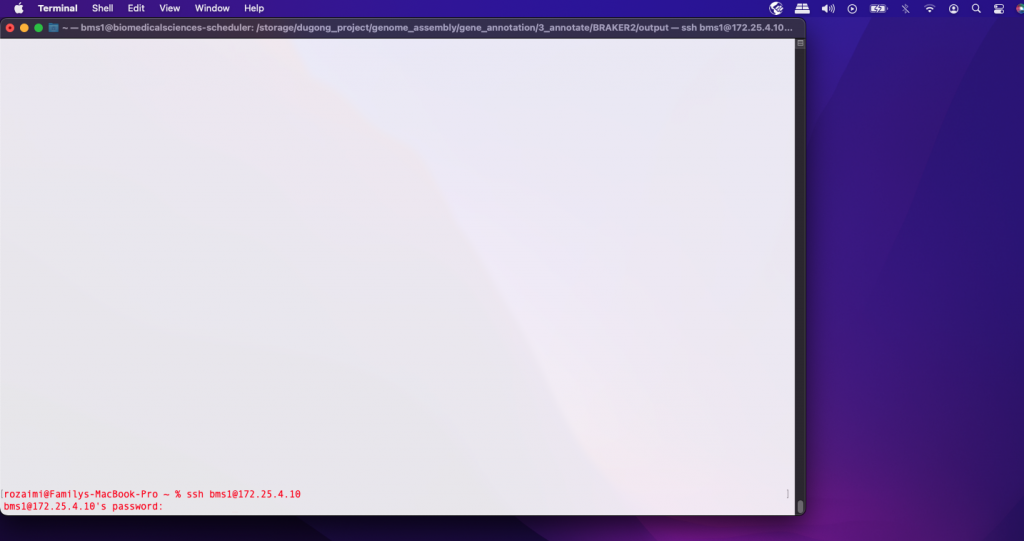
- Enter your temporary password qu1234.
- IMPORTANT: When you type your password, it may seem like nothing is showing up on the screen BUT it is there. This is just a security feature of Terminal.
- It will ask you to accept some agreements, just click Accept or OK for all of them.
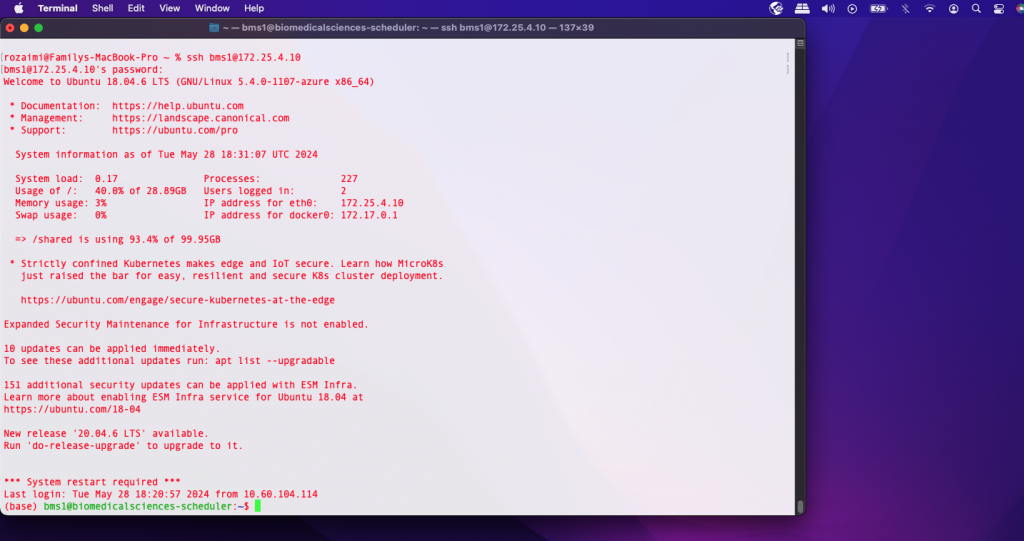
- Finally, you will see an image like below
3. Basic navigations
- Before we begin, there is ONE EXTREMELY IMPORTANT rule in Linux – Linux is case sensitive. Apple, apple and APPLE are considered as three different words.
- Also, be careful when it comes to spacing. A lot of students at the beginning will be confused when to use and when not to use space.
- To check where we are currently
- pwd
- stands for Print Working Directory. It tells us in which location/directory (a.k.a folder)/path we are currently in
- To check what kind of files and folders are available in the current location/directory/path
- ls
- stands for Listing. It will list all the available files and folders inside the location you are currently in
- To change location/directory
- cd
- stands for Changing Directory. If you want to move from one directory to the next, you need to type this command
- Directory structure
- In Linux, there is a ‘tree like structure’. The ‘root’ is called ‘/‘.
- Think of it like your house address
- Example: If you are living in Porto Arabia, The Pearl, Doha, Qatar
- /Qatar/Doha/ThePearl/PortoArabia/Rozaimi
- When you first logged into Linux, you will be directed to your ‘home’ – /home/users/your_username
- About Paths
- There are 2 types of paths in Linux
- Absolute
- specifies the complete location of a file or directory from the root directory (/)
- It starts from the root directory and includes all intermediate directories
- Always begins with a forward slash (
/). - Example:
/home/user/documents/my_file.txt
- Relative
- specifies the location of a file or directory relative to the current working directory
- doesn’t start from the root directory; instead, it’s based on your current location
- Example: If you’re currently in
/home/user, the relative path tomy_file.txtin thedocumentsdirectory would be:documents/my_file.txt
- Absolute
- There are 2 types of paths in Linux
- “Weird” symbols that are often used when moving around Linux
- A single dot/period ‘.‘ represents the location where you are currently in.
- Two dots/periods ‘..‘ represents one position outside of your current position.
- Example: If you’re in
/home/user/documents, the relative path to the parent directory (user) would be:../user
- Example: If you’re in
- A tilda (~) represents a shortcut to go to your home directory. So wherever you are inside the Linux “tree”, if you are lost, you can get “back home” by typing ~/
- To check where we are currently
Now, for the rest of the topics until topic no.8, we will be using the Linux tutorial from Ryan’s Tutorial – https://ryanstutorials.net/linuxtutorial/navigation.php
Click here after you have finished topic no.7 – Submitting task/jobs using SLURM